Between the extreme heat and the downpours, the framing crew has had a fun time this week. Despite the weather, though, they were mostly done with the exterior walls of the second floor and maybe only a day or so behind. Needless to say, Mother Nature did not want the trusses up on Friday. Nor did she want me to have a dry visit on Saturday. While J and the little one waited in the car, I donned the rain gear and headed into the sopping wet house. Even with the second floor down, it felt like a steady rain on the interior (just not as bad as outside).
The truss stack was still blocking my POR shot so I got this one with the lift instead. It's finally looking like a house!!
 |
| Rear layout |
Check out the sinkhole by the garage! Some brave little bunny was trying to protect the house from the water. I'm not sure how long he lasted...
 |
| bunny ears |
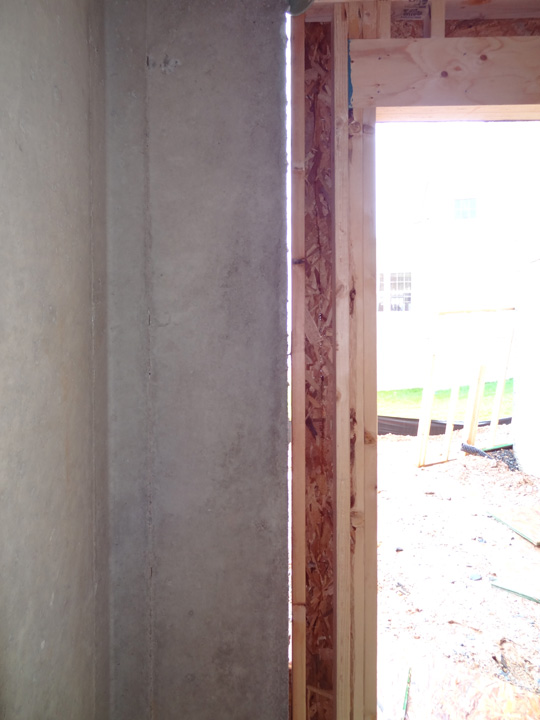
The owner bedroom extends over the garage by roughly two feet. We'll have to keep an eye on this area to make sure it gets sealed and insulated. In the corner by the door into the house, there's a decent-sized hole. I'm curious to see how they seal this area as it leads into the basement by the water heater and HVAC unit. It doesn't help that there's a load bearing beam on the other side.
 |
| Overhang into the garage |
 |
| Please patch me! |
I entered via the garage as the front entrance was a massive mud pile. The mud room felt really tiny but looking down at my muddy boots, I had a strong desire to chuck them off right there. One of the 2x4s in the mud room was definitely not like the others. It would be nice to be able to secure the drywall into this area. One of my dogs likes to lay up against walls and with this being a tiled (cool) area, he's likely to flop here and push in this piece of the wall. I wonder if they'll rip it out or just nail some scraps to it.
 |
| view from the kitchen to the front |
 |
| oddball 2x4 |
 |
| Study, with the garage beyond |
Looking up, I found some more pre-framed walls. We will have an odd semi-open foyer because of the stairs leading to the attic. I'll be able to walk by the round top window versus staring at it from afar. I suppose this also means I can't say it's too high for me to clean it now.
 |
| foyer |
 |
| from foyer, view into the living room |
 |
| from dining room, view into the living room |
 |
from living room, view into the dining room
(kitchen to the left) |
A pile of boards hides the opening to the basement. I think I saw the intended staircase in the mud...
 |
| pantry |
 |
| I peaked through a gap in the floor. |
When you walk out of the dining room and into the kitchen, you are hit with this lovely view into the family room. I love open concept floor plans!
 |
| view from the kitchen |
This portion of the family will have a small roof. The crew sure wasn't stingy with the glue!
 |
| swings for flies |
 |
| morning room with view |
Since going up wasn't an option, I headed toward the basement. I took quite a few shots of the basement and all the wet spots to check out in the future. Fortunately, I won't be posting all of them for you -- but I'll see if this video upload of my walkthrough works instead.
(edit: success on try #2 after some much needed sleep) The basement was definitely feeling like a dungeon today, with all of its echoing water drops, limited light, and wet, wet, wet everything.
basement walkthrough
 |
| Let there be light into my dungeon! |
 |
| entrance to the dungeon, with morning room above |
 |
| note to self, make sure this gets caulked |
 |
| My walls are crying! |
 |
| square puddle of rusty water |
This wet spot concerns me. Actually, all of the rectangular spots on the foundation walls worry me. These walls are just wicking up the water. I can't wait until they are dry and the exterior is sealed. Anyhow, I went back outside to check out the wall and noticed that the base is bulging. I hope it's just the way it was poured and not a structural thing...
 |
| wet spot without a puddle |
 |
| you may need to enlarge this to see the bulge a little better |
Our PM is hoping to have the cranes on site Monday and the trades (for HVAC, plumbing, electrical) in the house Tuesday-Friday. The tentative date for our pre-drywall meeting is the week of the sixth. I hope the lumber can dry completely before the drywall goes up (no mold, please!).
Now for the artsy portion of the blog. I tweaked the saturation, contrast, and exposure levels on these two--post-processing of course because I'm not that proficient with the camera's manual settings.
 |
| Extended joists for the fireplace |
 |
| Nails, nails, nails! |


AnJ, you have some great shots of your new home! I especially like the last one with the nails. Definitely one I would consider framing and putting in your home. But I am still amazed, what computer tool did you use for the options/selections page, I would like to use it and how did you get the wording on the pictures? You have some awesome skills. I would love to post my selections with the graphic tool. Tomorrow is the final selection day for us and than I can post. HOLLA!
ReplyDeleteThanks!!! :)
DeleteI use Adobe Photoshop for pretty much everything. The kitchen layout was made using layers and stretching individual images so it looks 3D. It's a little time consuming though. For the text, Photoshop allows you to add text to your images as well.
The full blown Photoshop is pretty pricy but you have a couple of alternatives: (1) Photoshop Elements is not as expensive and very useful if you like to do a little photo manipulation and not so much of the digital graphics. (2) You can download Paint.net (www.getpaint.com), which is a (free) open source software. It's actually pretty similar to Photoshop and a nice inexpensive alternative. There's a lot of functionality but don't worry, it get's easier the more you play with it.
If you just want to see your selections quickly, I found a few websites that might help:
(1) Lowe's has a decent virtual room designer but doesn't have all of the options that Ryan Homes offers. Still neat though. It requires a quick download and once you restart your web browser, just go back to the page and click the "Launch Designer" button. If you really want to play with the application, you can design your kitchen to match the layout exactly. They do have some presets for various rooms if you want a quick view.
http://www.lowes.com/cd_virtual+room+designer_189310537_/
(2) Ryan Homes also has a virtual designer but the counters don't look the greatest but it gets the job done. Plus, it should have all of the options that RH offers. There's only one kitchen layout but most of the RH models are similar any how.
http://www.creatingyourspace.com/ryanhomes/contentpage.aspx?Id=22404
Of course, if you have any questions or are in need of some quick editing, I'd be happy to help!
I'll be sure to check out your post! :)